|
|
|
|
|
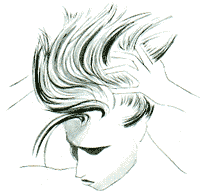
CHAPTER 8 Styling with a Little ArtificeThe easiest way is usually the best--providing you get the effect you want with your hair--which is why I love to dry and style the natural way, without depending on devices to
As the word implies, "perms" are relatively permanent, lasting three to five months. Setting is temporary; as soon as you wet your hair, the curl will come out, if it hasn't already relaxed from humidity, or wind, or being slept on. How long a nonperm set lasts is determined by the texture, wave, and body (natural or artificial) already in your hair and how much abuse it is subjected to. Hair that already has body will hold a set much longer than naturally straight hair, as will a set that is teased and sprayed (although I shudder to think what it costs your hair); even a tight set tends to "slide out" of straight hair just in the course of an ordinary day. If you wash your hair every morning, this won't matter much, as the hair must be rewet to be reset. (You can do dry refreshers with hot rollers or a curling iron, but this is not very effective in holding a style.) There are two basic ways to get a good set. The first--and oldest--is to set wet hair with curlers or roller or pipe cleaners or rags or clips. Then either let it dry naturally or "force-dry" it with some kind of hairdryer--hand held or the old helmet type. The second way is to set barely damp hair with a heating device: electric--or hot--rollers or a curling iron.
If you like the look that a roller set gives you, I recommend the heating device method because I think that ordinary rollers damage the hair in a number of ways: with the heat of prolonged forced-air drying, of course, but also because wet hair gets stretched around a roller (so the roller doesn't slip), and as the hair dries, it contracts and may break. I especially dislike those rollers with brushes in them because they tangle so badly in the hair, and women tend to yank them out--usually with some hair--in frustration. By the way, whenever you are working with rollers or other curling devices--whatever the kind--be sure to unroll or undo them in the opposite direction you rolled them or did them so you don't tear your hair. A roller or clip should never be dragged out; it can't be considered free of your hair until it actually falls into your hand.
You can get just as much body with electric rollers that are used right as you can with a wet set...and it's a whole lot faster. And although learning to use a curling iron is tricky, it can become a life saver--for touch-ups, for spot work (at the crown, for instance), and for those difficult little hairs around the hairline and neckline.
Hair should be moist--not quite dry--when you use hot rollers (the idea is not to bake the curl in, but to coax it in). The heat of the roller should simply finish the drying process. If you are freshening a set, or setting dry, you will want to use either the "Hair Freshener" (the recipe at the end of the previous chapter) or a setting lotion--which can be commercial or homemade: a good homemade setting lotion is beer mixed one to one with water. Your roller equipment will signal you when a roller is ready to be placed in the hair. Try not to let the rollers overheat, unless you are using them as a curling iron substitute. I personally prefer not to let a roller remain in the hair for more than two minutes, so you should plan to start removing the first rollers before putting the last ones in. In this way you can also get away with fewer rollers, as they can be reheated and reused. For the most natural look, I place the rollers randomly rather than in strict rows, and I use relatively large sections of hair (1 1/2 to 2 1/2 inches): the smaller the section and the smaller the roller, the tighter the curl. This also helps discourage the roller marks that occur with more traditional sets. And try not to use a comb to part and set; instead, divide sections with your fingers. Remember that you are not completely set until your hair has cooled as well as dried, so pull rollers out carefully--trying not to undo the curl--and then leave the curl alone until it is completely cool. When your set is finished and all your hair is cool, finger-comb before brushing, combing, or teasing, and then shake your head so you can see the shape. You may need to go back over a section, or you may decide you want a bit more fullness or height. Don't worry, the rest of the set will wait until you are finished...and when you're completely finished, that's when you'll want to do your styling. (See the next chapter, "Finishing Touches.")
A curling iron can be especially useful for curling the short, fine hair around the face and neckline or for other spot curling at the crown or in the front, but there are certain tricks to effective curling without sending your tresses up in smoke. It takes some practice to get the hang of it, so try first with a cool iron--catching your hair in it, wrapping, and then winding it up--until you feel entirely comfortable with the twisting motion that is required. (It helps to comb flat the section of hair you want to curl before you clip it against the surface of the curling iron.) Once the iron is hot, you must work fast; a curling iron requires only about thirty seconds per section of hair to work. The same principle applies to curling irons as to roller setting; the larger the section, the looser the curl. You may also use your hot rollers as a curling iron: simply let one get very hot (at least ten minutes on the rod) and then--holding it by its spikes--wrap your hair around it where you want to spot curl.  The trick here is not to clip it in, but to hold it for a minute as you would a curling iron, then gently unwind. Obviously you need to be very careful using this kind of intense, direct heat on processed or damaged hair. 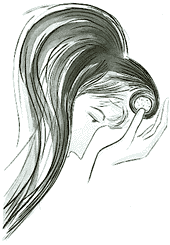 THE WET SET Wet setting is enjoying a resurgence in popularity these days since perms have become much more common. Perms allow you great styling flexibility...if you know how to set your hair. A perm can always be left to dry naturally, of course; it can also be the solid underpinning of an interesting set. If you set, consider a natural set that is easy on the hair and gives you a lovely soft look.
You probably already have what you need in your closet or medicine chest: cotton, to make rollers that will not pull or break the hair, and toothpicks, to hold them. To make a roller, break off cotton in two- to three-inch lengths (each will be about three-quarters of an inch thick) and roll and press into shape. Here's how to get a new look with an old-fashioned set: 1
Wash your hair and allow it to dry partially. 2
Apply a setting lotion by combing through hair. 3
Wrap hair around cotton, then roll up and fasten by sticking a toothpick through the middle--and under--the roller, or use two clips at the sides. Make sure not to wrap hair too tight, or the roller will squash. 4
Let hair dry naturally...if you have the time. If not, use a hand-dryer. 5
After removing roller, finger-comb into shape.
Everybody knows how to make pincurls, but I have a few suggestions: 1
Use clips, rather than bobby pins (which damage your hair and your teeth). 2
Make stand-up curls instead of those that are flattened to the scalp. 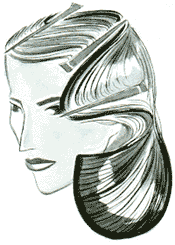 Hair should be slightly damp, but still wet enough to work with. Wrap a section around one finger and clip it to itself at the root. For a looser curl, use two or three fingers to make the loop and clip the same way. If you are not afraid of an even more extreme look, you might try using those old-fashioned "wave clips" that were so popular in the forties.
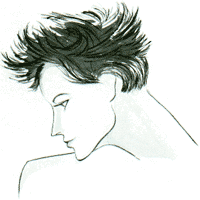
Perms and bodywaves, which are just gentler perms, done on larger rollers so that there is buoyancy rather than curl-are a good way to maintain a look and give your styling more life with almost no time investment past the initial processing. Traditionally, if you had very little natural body (curl or wave) in your hair, you would get a permanent wave so your set would hold from week to week. (Can you imagine!) Now, however, this kind of chemical processing is much more likely to be done simply to give your hair a little lift and movement...and most women expect not to have to set at all once they have a perm or bodywave. In a way, permanent waving has gone from being an expression of everything about hairstyling that we reject today (stiff, set, styled "hats" of hair)...to the ultimate in convenience.
The chemicals that make the wave or curl break down the structure of the hair so it can be reshaped around the curling rods. This process is then stopped by a neutralizer that "freezes" the hair strands into their new shape. Perming is literally permanent, because while the curl will relax somewhat over time, the hair's structure itself is altered the only way to rid yourself of a perm is to grow it out or cut it off. This means you must carefully evaluate what you want from a perm and how you want it to look, as well as assess the shape your hair is in (your hairdresser can be your closest ally in this, whether s/he does the perm in the salon, or you do it at home yourself). There is no question that your results with a perm are directly related to the condition of your hair before you get one. If your hair is damaged already, you can either wait till it grows out, cut off the damage, or spot perm selectively to avoid reprocessing already processed hair. A good perm should last four to six months. The hair can then be repermed, although I don't like doing so more than twice a year. You never know when the hair will just "give up" and emerge from its last perm looking like a helmet of feathers.
Whether you do your perm yourself or have it done in a salon, the most critical aspect of perming is keeping a careful watch on the chemical process. Personally I prefer the quicker cold wave (which takes five to ten minutes); I think there is less room for error, since I can tell immediately what is happening on hair I can actually touch (I constantly check the "rate of wave"), and I'm less sure about what is going on across the room under a dryer for the half hour or so the heat perms require. Moreover, my experience with heat-activated perms is that they can "take" unevenly, perhaps because of the air patterns in a dryer or the way the person sits. I'd rather have as much control as is practical. This is the kind of control you should strive for when you wave your hair at home. Check a curl every couple of minutes to make sure the processing action hasn't suddenly speeded up; what I look for to indicate "ready" is the appearance of a ridge in the hair when a rod is loosened. I always feel it is best and safest, by the way, to choose the largest rod that will do the job, and to underperm slightly.
There are lots of interesting things you can do with perming by varying the sizes of rods and the ways they are placed (long gone is the poodle look of the overall littlerod permanent wave). The first thing you want to do, however, is get your hair ready for the perm. Plan to have your hair cut before you get your perm. This helps to remove damaged hair and split ends that can make a horror of even the best perm. Your hair should be clean and damp when you start. You should also be clear in your own mind--and discuss this quite explicitly with whoever will be perming your hair if you're having it done at a salon--just how much curl you want. In the late sixties and early seventies, everybody was into a cloud of frizz standing away from the scalp...even if you started out with dead-straight hair. In the last decade, the trend has been toward softer and softer curl...sometimes so little that (like a great face-lift) it is almost impossible to tell anything has been done--you just look better. It is easy to get carried away and overperm, so if you want a bodywave (which means almost no visible curl), make that clear. And if you want loose curls rather than tight ones, make that clear, too.
Sometimes the whole head does not need to be permed; for instance, you might just want some lift at the crown (you can do this for long hair as well as short), because this is often the area that goes flat first. And there are other times when damage (at the temples, say) dictates that you not process that particular patch of hair anymore. You can also refresh a tired perm without redoing the whole head by spot perming. Perm just what you want and leave the rest to grow out a little longer (hair does not, as you well know, grow at the same rate all over the head). Bodywaves are not just for people with limp, straight hair, however. Sometimes even people with fairly curly hair find that a bodywave tames curl and helps the hair to look more stylish.
Straightening is simply perming hair straight. It is the same process without the rollers. I don't much care for straightening; I love the vitality and youthful look of managed curly hair. People with curly hair who get it straightened, it seems to me, end up with hair that looks a lot less natural and "bright," not only because curly hair tends to be more fragile and brittle, and so responds less well to chemical processing, but also because while it may be nearly impossible to tell whether someone has a perm or bodywave, you can almost always spot straightened hair. It's a little old-fashioned, like "set" hair. If you feel you must straighten, you should go to a salon to have it done. And go to someone who has experience with your kind of hair and with the straightening process itself: if you overperm, you can often hide damage and problems with skillful cutting, but if you overstraighten, breakage will show. Spot straightening may be the better strategy, giving you the effect of less frizz by allowing just the hairline to forelock to blend in with the rest of the hair.
When you plan both to color and wave your hair, you must be aware that you are intending a double insult to it, raising the chances of something going wrong so that--one way or the other--you end up overprocessed. Perms should always be done before coloring, as they lighten the hair's color (natural or no) at least a shade...and they may lift artificial color in unpredictable ways. The very least span of time between perming and coloring should be a week, and preferably two or three weeks.
These gloppy styling aids are the beauty industry's latest hot sellers. Unfortunately, not enough people really know how to use them, so they tend to collect in the back of the medicine chest along with all the other beauty stuff you have bought and found "didn't work." Mousses and gels can be a lot of fun to use--if you know how--because they let you create effects that cannot be gotten any other way. I prefer them for spot styling, but some people don't mind using them as an all-purpose styling aid. One thing you are going to want to keep in mind when you use mousses and gels--as when you use anything on your hair is that they can be drying and damaging to delicate hair (many of them contain alcohol), as well as gummy on oily hair. They also leave a residue that can build up, even with daily washing, and they may make your scalp itch, flake, or burn. These aids are especially interesting to use to produce sculptured effects that accentuate the good points of your face and play down poor ones--slicking back the sides, building height at the top, manipulating bangs so that they spike, or curl...or do whatever you want.
Both gels and mousses can be used as setting lotions, although they may leave you with very stiff hair. Once one of these compounds has dried, it can be a problem to comb hair or otherwise "break" a style, depending on what you have used (the European gels are the worst offenders), your hairstyle can collapse completely and leave a blizzard of tiny gel bits in your hair and on your clothes. (If you don't disturb it, though, gel will give you a slick, wet look.) Some of the mousses, on the other hand, can be combed out and function more like a super-setting lotion.
If this is what you want to do, start with slightly damp hair, although your hairstyle should be well on its way to where it is going. If you are using mousse, you will need a palmful to style your hair; if you are using a gel, a glob the size of a dime should do it. Mousse can be massaged into hair and then the hair "scrunched" and pushed into a style. Gel is used much more like old-fashioned brilliantine: slick on, then comb or push your hair into place. In both cases, let the style set until the mousse or gel has dried. You'll have to experiment to see which products you can play with after they have dried and which leave you worse off than when you began. If you would like to make your own mousse, here is a recipe for one that sounds so delicious you may want to eat the leftovers!
Every once in a while I work with a client who wants something really different...even bizarre. This is a kick to do occasionally, but it certainly doesn't make up the major part of my work--even here in high-style New York City.
There are very few people--women or men--who either like, look good, or are in a position to wear some farout style. It is easier to get away with if you are young, very good-looking, or in the arts, but you're unlikely to see something too wild waltzing out of my salon. I can (and do) high-style hair with the best of them. Also, because I really like people--and especially some of the women clients I work with--I like to see them looking pretty...and it's hard to look pretty with a Mohawk--even a modified Mohawk. Think carefully about an especially trendy look. You may have to live with it a long time...as a shmohawk. | ||||||||||||
|
 do it. But sometimes--perhaps because you are feeling a little daring and experimental, or you want a more elaborate look for a special event, or you have simply given up trying to get your hair to do anything you consider acceptable--you want extra volume, body, height, or more curl or shape. Setting or perming (which includes the body wave--a light perm that changes the texture, body, and hold power of the hair) can do all these things, as well as giving you more flexibility in styling your hair.