CHAPTER 7
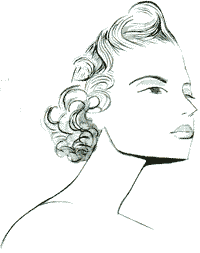
Styling the Natural Way-
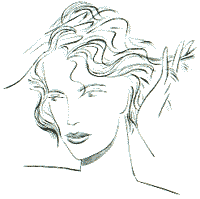
Hands-on Drying Methods If your hair is cut properly, it should virtually style itself...and if you know how to finger-dry, you can just wash and go. I have outlined a progressive program of drying/styling that will let you choose just the right amount of involvement with your 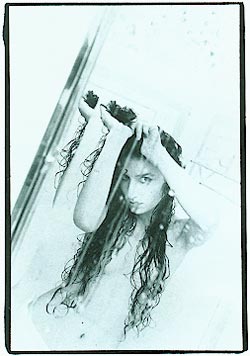 freshly washed hair to give you the results you want. freshly washed hair to give you the results you want.
In general I am against using any styling aid that can damage hair...and the number-one common offender on my list is the injudiciously applied heat of a blow-dryer. Many people use this particular tool, and many people use it incorrectly. If you must blow-dry, learn how to do it with finger-combing, so that you can control the process and don't hurt your hair.
THE RIGHT WAY TO DRY YOUR HAIR
A good styling really begins the moment you start drying your hair after it has been washed. Resist the temptation to "scrub" your hair dry (something all of us tend to do...especially when we are in a hurry); instead, squeeze it gently in the folds of a thick towel. Don't use fabric softeners on your towels, by the way; it makes them soft and smell good, but it cuts down on their ability to absorb water.
When your hair has gone from wet to damp, you are ready to style it. With your fingers.
There are a few lucky people whose hair is "lively" enough to just wash and wear--it dries naturally, and the lines fall right in, with no loss of bounce and lightness. Even if this hasn't been true for you up until now, or if you haven't felt you wanted to try it, I still think you will find that, with the right cut, finger-drying is all the styling you will need.
I am very much against applying heat directly to the hair, and finger-drying is one way of helping hair to style itself without courting heat damage. Actually, finger-drying is related to the massage technique (see Chapter 2). The more you study your own head shape, the easier self-styling becomes.
HERE ARE THE STEPS TO A SUCCESSFUL FINGER-DRYING:
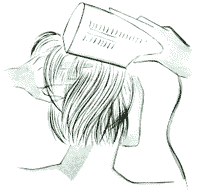
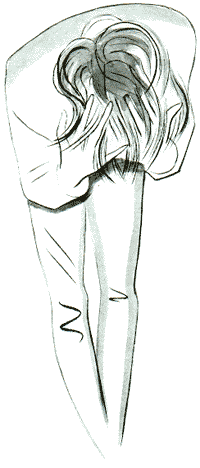
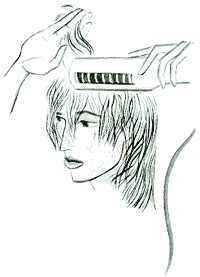
- Hang your head upside down and carefully pull fingers through the hair from root to end. Work from front to crown, then temples/sides to back. (Your finger positions should remind you of those you use for massage.) It is important to remember that you are working through your hair. Tease out any knots with your fingers, and never pull!
- When you have detangled your hair, give your head a gentle shake to encourage the hair to begin to "find" its shape.
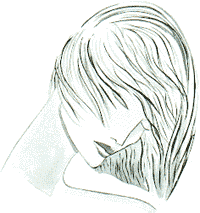
- Flip your head up--and your hair back--and run your fingers through your hair once again from front to back (top first and then sides). You should do this even if you have bangs that will be pushed forward. You will, I promise you, begin to feel a sort of "lift" coming right from the roots of the hair.
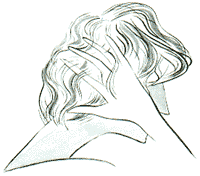
- Depending on how thick and/or still wet your hair is, push fingers in toward the roots and lift hair away from the scalp with a little shivery motion, encouraging it to dry in the air that you are shaking through it. Do this until the ends begin to dry.
- As soon as the ends are dry, you should pause to "press in" the shape of the style. Don't be afraid to use your fingers to mold a curve or direct the front or sides.
- Once you have shaped your hair, use fingers just at the roots to lift it once again away from the scalp. Try to do this without disturbing your shape, traveling from top front to crown and from temples to back. Be especially careful to get in under the hair behind the ears and to lift away from the back and sides of the head.
- You will probably want to go back to the crown to lift a final time, as this is where you are likely to be looking for extra height.
- Now let your hair finish drying naturally.
HERE'S HOW TO FINGER-COMB
WITH A BLOW-DRYER:
 - Start with hair that is almost (naturally) dry. Wet hair is more elastic and weaker and therefore easier to break.
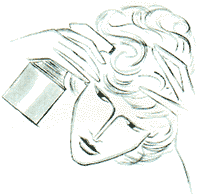
- Use a blow-dryer with which you can direct the heat as much as possible. The better dryers come with a little baffle that can be fitted over the nozzle to give you a tighter "aim." The heat should be at medium high or high: this method uses short blasts of higher heat, which in the long run is, I think, less damaging than going back over the hair again and again at a cooler temperature.
- Dry with your head upside down if it doesn't make you dizzy. Let gravity do some of your lifting work for you.
- Hold chunks of your hair by the ends, directing the blast at the roots for no more than a couple of seconds per chunk. This will leave the delicate, likely-to-fray ends to retain their natural curl and is kinder to them. Doing this all over your head will give you the basic lift.
- Now you will want to cover the whole head once more (you can go back to right side up). Beginning with the crown and using your fingers, lift the hair near the scalp and finish off the drying job. (Follow the same drying pattern you used for finger-drying, and don't forget to give special attention to the back; just because you can't see it doesn't mean it isn't as important--especially to balance the head.) If your fingers are down in the hair at the source of the heat, you won't overdry or burn the hair shaft.
- You will be surprised at how little drying there is left to do once the area near the scalp is dry. I prefer to leave the top layer just the littlest bit damp, to dry on its own. This gives a much more natural look to the hair and, as I said, protects those delicate ends. A light spritzing after your hair is dry will give the ends a little more finish and curl. (See "Hair Freshener" recipe at the end of this chapter.)
STYLING HAIR WITH A BLOW-DRYER
A blow-dryer can be used more actively, however--not just to bring out the best in your cut, but to actually "set" (or in some cases straighten) the hair. A blow-dryer used this way becomes in a sense a different tool and requires the partnership of a styling brush (usually a round one) to get the best results.
CURLING WITH A BLOW-DRYER
You can use a round brush (see the section on brushes in Chapter 5 for brush selection) like a large roller, directing the heat of the 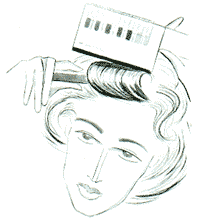 dryer right at it and then unrolling the brush gently, leaving each curl to cool while you go on to the next swatch of hair. (This cooling process is an important part of your set; don't touch the results until the hair shaft has cooled entirely. In fact, it's best to finish the whole head before testing the curls by pulling them out or brushing them into shape.) dryer right at it and then unrolling the brush gently, leaving each curl to cool while you go on to the next swatch of hair. (This cooling process is an important part of your set; don't touch the results until the hair shaft has cooled entirely. In fact, it's best to finish the whole head before testing the curls by pulling them out or brushing them into shape.)
You will of course need to choose a brush of the right diameter for you--smaller for tighter curls, larger for smooth curves. I prefer the larger brush in almost every case, but you might want to ask your hairdresser what s/he recommends.
When you set this way, be careful not to wrap the hair too tightly around the brush: it stretches when wet and then contracts as it dries, and if it is already tight around the brush, it will be stressed and may break.
 It should also go without saying that you will need to be very careful about the amount of heat you apply, especially if you are not directing it at your scalp, which warns you when it is too hot. For this reason, I think it is best to be more conservative about the heat setting than you are when using the short hot bursts that are right for fingercombing.
You may not want to set your whole head this way, but rather just give a curve to the bottom of the hair. This is called "turning the ends" and is one of the most time-honored uses of blow-dryer and brush. Skillful end turning can give a nice, smooth line to a midlength hairstyle.
 To turn the ends, use a large-diameter brush. Catch just the ends of the hair (you may even want to pat the hair over the bristles if you are new to the technique) and then give a half twist to the brush.
Direct the heat at the ends and move the dryer back and forth over the length of the brush. You may find the hair slips slightly through the bristles. This is fine, as it helps the hair to curve as you are drying it. Just don't pull too hard!
Repeat for the ends of the hair all the way around the head. If you find that one part curves more than the rest, you can pull out the curl by reapplying heat as you pull the brush gently through that one spot.
USING A BLOW-DRYER
TO STRAIGHTEN YOUR HAIR
I'm never sure I really understand why someone with curly hair would want to pull out all that dynamic movement (I'd certainly not do it to myself!, but there are people who for one reason or another want to use their blow-dryer to make their hair seem straight. So for them, here goes:
You use the heat of a blow-dryer to straighten hair in much the same way as one uses an iron to press cloth: the heat changes the character of a hair strand, and the pulling motion of the brush determines its new character. And just as you dampen clothes to encourage the best ironing job, so you leave your hair just a little damp to allow the heat to be most effective. (The same principle applies to nonheat drying, by the way. Some time try "ironing" a ribbon by wetting it and smoothing it onto some flat, nonporous surface--like a bathtub--and leaving it there to dry. This is like the old method of wrapping wet hair around the head and then allowing it to dry naturally to straighten it.)
HERE'S HOW TO STRAIGHTEN YOUR CURLY OR WAVY HAIR:
- Use the largest round brush you can find or a flat brush with a slight curve in its belly. This kind of drying can be especially hard on hair that tends to break easily and frizz at the ends anyway, so you will want to work as quickly as you can to smooth it and get it dry.
- If your hair is long or very curly, give a shot to the ends first by turning them just as you would if you were finishing straighter hair. (This helps to keep it from tangling as you work out from the scalp.)
- Start with the hair underneath at sides and back, then do the overlayers and top. Do the front last. This allows you to smooth the top layers after the others have been done. If the front dries while you are working on the rest of the hair, you can wet it with a little water spritz (preferably herbal or floral), or the "Hair Freshener" recipe at the end of this chapter.
- Start close to the scalp, hooking the brush into the hair near the root, and then very slowly pull it out toward the end. Play the hot air back and forth over the surface of hair exposed by the brush. The idea is to leave a smooth trail through the hair.
- You may find it most effective not to dry the hair completely the first time through, but to give yourself two "smoothing tracks"--one on top of the other--to ensure even drying. (A hot blast at the surface that is presented by the brush will dry only that surface. A second time through changes the presenting surface and gives you a more even dry.)
- Give yourself a last smoothing go-through, playing the heat lightly over the head and smoothing with the brush. (You can use one of your regular or natural-bristle brushes for this job.) Don't forget that your hair isn't done until it has cooled off.
- If your hair is especially unruly, spray hairspray on your palms --not directly on the hair--and smooth over the hair's surface. Or you can use pomade or brilliantine, which are discussed in the next chapter.
- And...never try to hurry a job like this. Blow-drying to straighten can take a considerable portion of your grooming time if it is done right. I hate the look that comes from haste or carelessness, where hair could pass for slabs of Brillo, shingled one patch over the other.
There is one really interesting effect you might want to try if you have wavy or curly hair, which can be achieved by blow-drying just the ends of your hair. This gives a sort of blunt-cut effect to hair that usually doesn't look that way and can be a nice change for someone who is always dealing with curls.
I think it's always nice to have a bottle of hair freshener ready. You can use it to wet down for a between-wash styling, to cut static electricity in the winter, to perk up in the summer to revive curl, or just to freshen your mood.
Keep your hair freshener in the refrigerator.
Hair Freshener (Home Spritz) |
| |
| In a spray bottle mix well the juice of half a lemon or half a grapefruit with 1 pint Perrier or Evian water.
Use when needed for a pickup. |
|